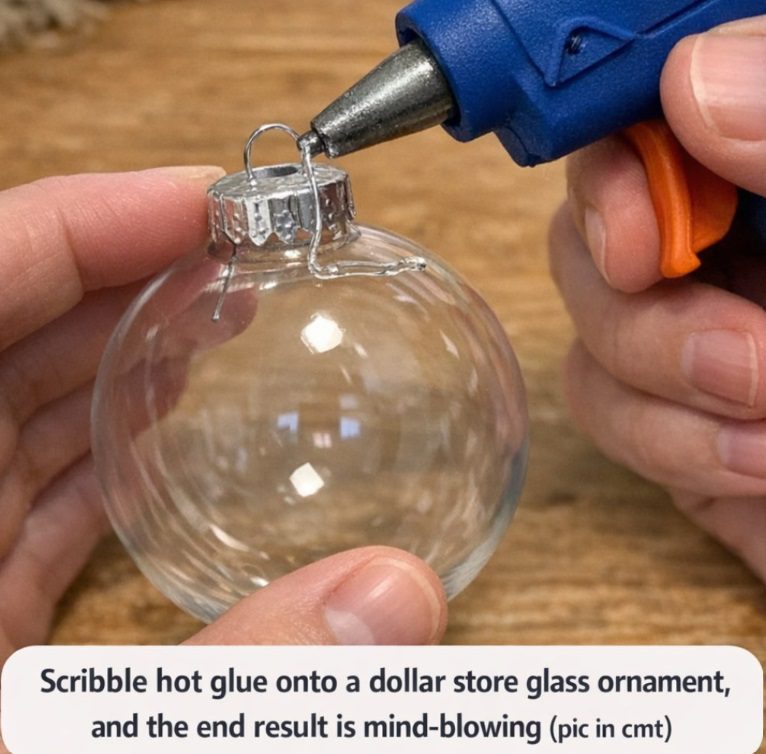
Scribble hot glue onto a dollar store glass ornament, and the end result is mind-blowing
DIY Vintage Embossed Glass Ornaments
There are some holiday crafts that look much harder than they really are, and these vintage embossed glass ornaments are one of my favorites. With a plain glass ornament, a little hot glue, and metallic paint, you can create raised details that give inexpensive ornaments the look of old-fashioned holiday decorations.
I especially love this project because it is easy to make in an evening. You can work on several ornaments at once, experiment with different patterns, and end up with a set that looks handmade, vintage, and much more expensive than it actually is.
Materials
- 6 clear glass ball ornaments, 3 inches wide, with removable metal caps
- 1 low-temperature hot glue gun
- 2 mini low-temp clear glue sticks, 4 inches each
- 2 ounces metallic acrylic paint, champagne gold
- 2 ounces metallic acrylic paint, antique silver
- 1 ounce metallic acrylic paint, dark bronze or soft brown metallic for aging details
- 2 sponge brushes, 1 inch wide
- 1 small fine-tip paintbrush, size 2 or 3
- 1 soft lint-free cloth
- 4 cotton pads or cotton balls
- 1 tablespoon rubbing alcohol or glass cleaner for prep
- 1 can clear acrylic spray sealer, satin or matte finish
- 1 sheet parchment paper or freezer paper to protect the table
- 6 pieces ribbon or ornament hooks, 8 to 10 inches long each, for hanging
Instructions
- Prepare the ornaments: Cover your work surface with parchment paper and remove the metal caps from the ornaments. Wipe each glass ball with rubbing alcohol and let it dry completely.
- Create the raised design: Warm the low-temperature glue gun until the glue flows smoothly. Hold one ornament carefully and draw thin swirls, dots, scallops, and looping lines directly onto the glass.
- Add the details: Leave small areas of smooth glass between the raised lines so the pattern does not look crowded. Add small dots around curves and intersections for an embossed effect.
- Let the glue cool: Set the ornament down carefully and allow the glue to cool for about 10–15 minutes. Repeat with the remaining ornaments, changing the patterns slightly for a more collected look.
- Remove glue strings: Once the glue is firm, gently pull away any thin glue strings with clean fingers or a dry paintbrush.
- Paint the ornament: Pour a small amount of metallic acrylic paint onto a disposable plate. Lightly load a sponge brush and dab the paint over the entire ornament, covering both the glass and raised glue details.
- Add a second coat: Let the first coat dry for about 20 minutes, then apply a second thin coat for more even coverage and a richer finish.
- Add an aged finish: For extra vintage depth, use the fine-tip brush to lightly dry-brush a small amount of dark bronze or brown metallic paint over the raised lines. Wipe most of the paint from the brush first so only a little catches on the texture.
- Seal the ornaments: Let the paint dry completely, then carefully replace the metal caps. In a well-ventilated area, spray each ornament with 1–2 light coats of clear acrylic sealer, allowing the first coat to dry before applying the second.
- Add the hanger: Once everything is completely dry, attach ribbon or ornament hooks. Your finished ornaments are ready for the Christmas tree, a decorative bowl, or holiday gift wrapping.
Variations & Tips
- For a collected vintage look, use different finishes throughout the set. Try champagne gold on two ornaments, antique silver on two, and bronze on the remaining two.
- Keep the glue lines thin for a cleaner embossed effect. Holding the glue gun just above the glass instead of pressing the tip against it can help create smoother raised lines.
- For patterns, try vines, scallops, snowflake-inspired curls, berry dots, or decorative bands around the center of the ornament.
- If the metallic paint looks streaky, use a dabbing motion with the sponge brush instead of brushing back and forth. This helps create more even coverage while preserving the raised texture.
- For a handmade gift, tie a finished ornament with velvet ribbon and place it in a small box lined with tissue paper.
- Safety tip: Work with the hot glue gun and spray sealer carefully, following the manufacturer’s instructions. Use the spray sealer outdoors or in a well-ventilated area.
How to Use the Finished Ornaments
Hang these ornaments on the Christmas tree where the metallic finish can catch the lights. They also look pretty gathered in a decorative bowl or used as a finishing touch on wrapped gifts.
Mixing different metallic colors and patterns makes the collection feel more handmade and gives each ornament its own little character.
Storage
After the holidays, wrap each ornament individually in tissue paper and store them in a divided box. Keeping the ornaments from rubbing against one another will help protect the raised glue designs and painted finish.
Final Thoughts
These vintage embossed glass ornaments are proof that a simple craft can still have a beautiful finished look. A few inexpensive supplies, some simple glue designs, and metallic paint are all it takes to turn plain glass ornaments into something that feels wonderfully old-fashioned and handmade.