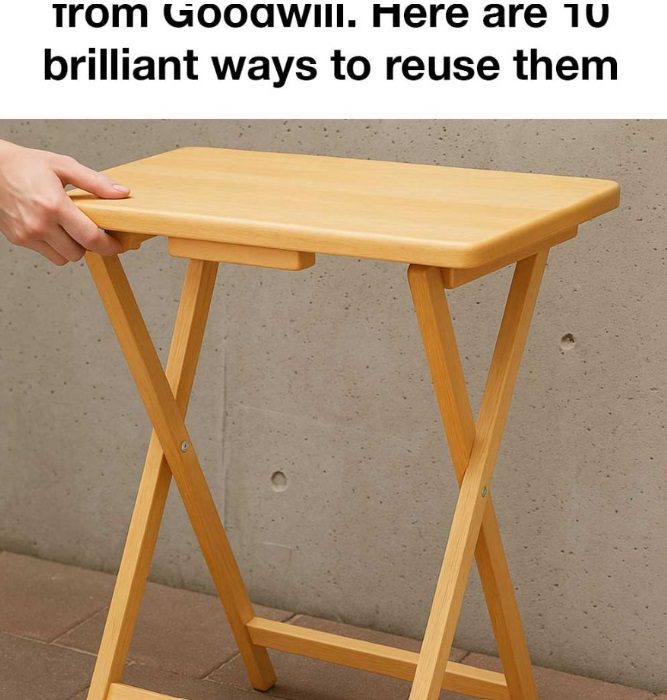
Don’t overlook these trays from Goodwill. Here are 10 brilliant ways to reuse them
10 Creative Ways to Repurpose Thrift Store Trays into Beautiful Home Projects
Some of the most interesting home decorating finds aren’t sitting on the shelves of expensive furniture stores. They are tucked away in thrift shops, waiting for someone to see their potential. Old serving trays are a perfect example. Whether made from wood, metal, plastic, or sturdy composite materials, these everyday household pieces can become surprisingly useful with a little imagination.
A tray that once held snacks during family movie nights or carried coffee and breakfast around the house doesn’t have to spend the rest of its life collecting dust. With a fresh coat of paint, a few simple supplies, and some creative thinking, it can become a decorative accent, an organizing solution, or even a completely different household accessory.
Goodwill and other secondhand shops are especially interesting places to look for these forgotten pieces. You may come across traditional wooden trays, colorful metal designs, or vintage TV dinner trays with patterns that bring back memories of another era. Instead of passing them by, consider what they could become with a little DIY attention.
The Appeal of Vintage TV Dinner Trays
Vintage TV dinner trays have a special place in many American homes. They were once a familiar part of everyday family life, making it easy to enjoy a meal or a snack while watching television.
Today, these trays are appreciated for their retro appearance, interesting patterns, and practical designs. Some feature colorful floral prints, others have classic geometric details, and many come with folding metal legs that make them especially useful for creative projects.
Their original purpose may have changed, but their sturdy construction and nostalgic character make them interesting materials for upcycling.
Even a tray with an outdated finish can become something attractive when paired with the right colors, decorative details, or hardware.
Why Look for DIY Materials at Goodwill?
Shopping at Goodwill and other thrift stores can make home decorating projects more affordable. Rather than purchasing brand-new materials for every idea, you can often find useful pieces that only need cleaning, repairing, or a little customization.
The inventory also changes regularly, which means every visit can bring something different. One day you might find a wooden serving tray, while another visit could reveal a vintage metal TV tray with an interesting pattern.
Buying secondhand items can also help extend the useful life of products that might otherwise be discarded. Reusing existing materials is a practical way to reduce household waste and make more thoughtful decorating choices.
Before purchasing an old tray, check that it is structurally sound. Look for loose handles, rust, deep cracks, sharp edges, and damaged folding legs. A little preparation can make the difference between a successful DIY project and an item that isn’t suitable for reuse.
1. Turn an Ordinary Tray into Eye-Catching Wall Art
An old tray can become an unexpected piece of wall decoration, especially if it has an interesting shape or a decorative border.
Start by cleaning the surface thoroughly and removing any loose paint or rough areas. Wooden trays can be lightly sanded before applying a new finish, while metal trays may need an appropriate primer before painting.
Choose colors that complement the room. Soft cream, muted green, navy blue, or warm terracotta can create a beautiful decorative effect. If you enjoy more detailed designs, use stencils to add floral patterns, geometric shapes, or simple vintage-inspired artwork.
Once the finish has dried completely, attach suitable hanging hardware to the back. Make sure the tray’s weight is supported by the correct wall anchors and fasteners.
A collection of different-sized trays can also make an interesting gallery wall. Mixing old patterns with freshly painted designs gives the arrangement a collected-over-time appearance.
2. Create a Practical Coffee Table Tray
A serving tray is one of the easiest thrift store finds to turn into something useful. With a little sanding, paint, and a pair of handles, an ordinary tray can become a stylish coffee table accessory.
Begin by checking the handles and corners to make sure everything is secure. Sand away rough spots if necessary, then apply wood stain or furniture paint suitable for the material.
For a more traditional look, choose a warm wood finish with simple metal handles. If your living room has a lighter decorating style, a white, beige, or soft gray finish may work beautifully.
Use the finished tray to keep remote controls, coasters, small decorative objects, or reading materials together.
It can also make a coffee table look more organized because smaller everyday items have a designated place instead of being scattered across the surface.
3. Make a Personalized Jewelry Organizer
Small decorative trays can be especially useful for organizing jewelry. Instead of keeping necklaces, bracelets, and earrings in separate boxes, you can turn one thrift store find into a personalized storage display.
First, measure the inside of the tray and cut a piece of felt or velvet fabric to fit the base. This soft lining helps protect jewelry from scratches and gives the finished organizer a more polished appearance.
You can add small hooks along the upper edge for necklaces and bracelets. Small compartments or removable dividers can help separate rings, earrings, and other accessories.
If the tray has a decorative design, consider leaving parts of the original finish visible rather than covering everything.
Place it on a dresser or dressing table where your favorite pieces are easy to find. A tray with a deeper frame may also work well as a wall-mounted jewelry display, provided it is securely attached.
4. Build a Decorative Plant Stand
If you enjoy decorating with houseplants, an old tray can become a charming base for displaying smaller pots.
A sturdy wooden tray is a good starting point. You can attach short furniture legs or a suitable pedestal underneath to raise it above the floor or tabletop.
Before assembling everything, check that the tray can support the combined weight of the plants and their containers. Use appropriate screws and brackets, and make sure the stand sits evenly without wobbling.
Paint or stain the tray to match your room. A natural wood finish works nicely with greenery, while a painted surface can create a more playful decorative accent.
Place small potted plants, decorative planters, or lightweight accessories on top. A waterproof liner or separate plant saucers can help protect the tray from moisture and water stains.
This project is particularly useful for giving a small corner, windowsill, or empty tabletop a little more personality.
5. Design a Custom Serving Tray for Guests
An older tray can become a lovely serving accessory for family gatherings, weekend brunches, or afternoon coffee.
Look for a tray with a sturdy base and comfortable handles. If the existing handles are damaged, replace them with suitable hardware that can safely support the intended weight.
There are several ways to customize the surface. You could use decorative paint, patterned paper sealed beneath an appropriate clear finish, or a mosaic-inspired design.
For a simple farmhouse appearance, try a natural wood finish with black or brushed-metal handles. A more colorful design might include floral details or a patterned center.
One important consideration is food safety. Decorative paints, adhesives, and craft sealants are not automatically suitable for direct food contact. Use cups, plates, or other food-safe serving containers, and follow the product manufacturer’s instructions before using the tray around food.
The finished piece can be both attractive and practical, especially when entertaining guests.
6. Organize Your Workspace with a DIY Desk Tray
A cluttered desk can make even simple tasks feel more difficult. Fortunately, a shallow serving tray can provide an easy way to organize everyday office supplies.
Start with a tray that fits comfortably on your desk. Clean it, refresh the finish if necessary, and add small containers or dividers to create separate storage areas.
You can organize items such as:
- Pens and pencils.
- Paper clips and pushpins.
- Sticky notes.
- Small notebooks.
- Charging cables.
- Scissors and other stationery.
For an extra creative touch, attach a small corkboard section or removable note holder to one side of the tray.
A wooden tray with a fresh coat of paint can look especially attractive in a home office. You can also leave the original finish untouched if it already has a style you like.
The best part is that everything stays together, making it easier to move your supplies whenever you need to clear your workspace.
7. Create a Decorative Bathroom Caddy
An old tray can also find a new purpose in the bathroom. With a little attention to the finish, it can become a decorative caddy for toiletries and everyday essentials.
Choose a tray that is easy to clean and suitable for the bathroom environment. If it is made from wood, apply a finish specifically intended to protect the material from moisture, following the manufacturer’s directions.
Use small jars, baskets, or containers to keep items organized. You might place hand towels on one side, skincare products in the middle, and soap or other bathroom accessories toward the back.
A neutral paint color, natural wood finish, or simple white design can give the tray a relaxed spa-inspired appearance.
Keep in mind that even a properly finished wooden tray should not remain wet for extended periods. Wipe away spills and allow it to dry between uses to help maintain its condition.
8. Make a Custom Pet Feeding Station
Pet owners may find an old tray useful for creating a more organized feeding area.
A sturdy tray with a suitable size can serve as a base for food and water bowls. It helps keep the bowls together and provides a defined space for mealtimes.
For a simple version, place two removable pet bowls directly inside the tray. Choose bowls that fit securely without tipping over.
If you want to create a more customized station, you can add properly sized openings to a suitable wooden tray so the bowls sit in place. Measure carefully before cutting, and sand all edges until they are completely smooth.
Avoid using damaged or unstable trays, and make sure any paint, finish, or adhesive has fully cured according to its manufacturer’s instructions before introducing the item to your pet.
The finished station can be personalized with your pet’s name or a simple decorative design.
Always keep food and water bowls removable so they can be washed regularly.
9. Turn a Tray into a Unique Picture Display
A tray with a raised border can make an interesting alternative to a traditional picture frame.
The depth of the tray creates a natural space for arranging photographs, postcards, artwork, or other small keepsakes.
Start by measuring the inside dimensions. Cut a backing board to fit, then arrange your chosen pictures before securing anything permanently.
You can create a family photo collage, display travel memories, or combine small prints with decorative paper for a more artistic arrangement.
For a finished look, use suitable clips, mounting strips, or other secure attachments. If you want to add a glass or acrylic cover, make sure it is properly sized and safely fitted.
A tray with an attractive vintage pattern can also be left partially visible around the photographs, adding character to the finished display.
This is a lovely way to reuse an item while giving meaningful memories a place in your home.
10. Design a Fun Activity Board for Children
A shallow wooden tray can become a creative activity board that encourages children to explore, draw, and experiment.
Begin with a tray that has smooth edges and a stable construction. Depending on the child’s age and interests, you can turn the surface into a chalkboard, magnetic activity area, or simple drawing station.
Chalkboard paint can provide a reusable surface for doodles, letters, and little drawings. Alternatively, a magnetic surface can be used with appropriately sized magnetic pieces.
For a more hands-on project, add simple interactive elements such as large knobs, safe latches, or textured materials that encourage exploration.
Make sure every component is securely attached and appropriate for the child’s age. Avoid small detachable pieces, sharp hardware, exposed screws, and anything that could present a choking or injury hazard.
This project can be customized with bright colors, simple shapes, or a child’s favorite theme.
It is a practical way to turn an overlooked household item into something that can be enjoyed during playtime.
Helpful Tips Before Starting a Thrift Store Tray Project
Before turning an old tray into something new, spend a few minutes checking its condition and preparing the surface.
These small steps can help make your project easier and more successful.
- Clean it thoroughly: Remove dust, grease, and dirt before painting or applying a new finish.
- Check the material: Wood, metal, and plastic require different preparation methods and products.
- Look for damage: Avoid trays with deep cracks, unstable legs, severe rust, or loose hardware.
- Choose suitable paint and finishes: Make sure the products are appropriate for the tray’s material and intended use.
- Measure before adding accessories: This is especially important when installing handles, dividers, legs, or bowl openings.
- Allow enough drying time: Follow the manufacturer’s instructions before handling or using freshly painted or sealed surfaces.
- Think about the final purpose: A tray used for decoration may require different materials and finishes from one intended for bathroom storage or serving.
A little preparation can save time and help you get more use out of your finished creation.
Final Thoughts: Give Forgotten Trays a Fresh Start
The next time you visit Goodwill or another thrift store, take a closer look at the serving trays and vintage TV dinner trays on the shelves. What may seem like an ordinary household item could become a useful organizer, a decorative accent, or a personalized addition to your home.
From coffee table accessories and jewelry displays to plant stands and children’s activity boards, these simple projects show how many different ways an old tray can be reused.
You don’t need an expensive collection of tools or professional crafting experience to get started. Sometimes a little cleaning, a fresh coat of paint, and a thoughtful idea are all it takes to give something old a completely different purpose.
Upcycling is also a practical way to make use of items that are already available instead of always buying something new. And when you find a vintage tray with an especially interesting pattern or shape, you get the added pleasure of keeping a small piece of household history in use.
So before walking past those trays at your next thrift store visit, imagine what they could become. Your next favorite home DIY project might be waiting right there on the shelf.