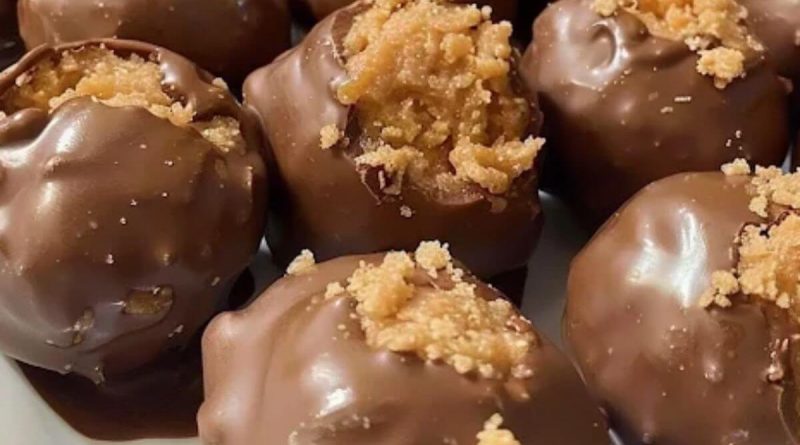
Butterfinger Balls
There’s something irresistibly nostalgic about a peanut butter and chocolate treat — that sweet aroma, the satisfying crunch, and the melt-in-your-mouth finish that takes you right back to childhood. These Butterfinger Peanut Butter Balls capture that same comfort in bite-sized form, combining creamy peanut butter, crushed Butterfinger candy, and smooth chocolate in the most delightful way.
They’re the perfect no-bake dessert for holidays, parties, or anytime you crave something sweet without turning on the oven. Every bite bursts with peanutty richness, crispy candy bits, and a silky chocolate coating that makes these treats simply unforgettable.
Whether you’re gifting them, serving at gatherings, or sneaking one straight from the fridge, these easy peanut butter candy bites are the kind of family-friendly comfort food everyone loves.
What You’ll Need
For the Peanut Butter Mixture
- Peanut butter (smooth) – 1 cup
- Unsalted butter (softened) – ¼ cup
- Icing sugar – 2 cups
- Butterfinger candy bars (crushed) – 3
For the Chocolate Coating
- Semisweet chocolate chips – 2 cups
- Vegetable oil – 1 tbsp
How to Make Butterfinger Peanut Butter Balls
Step 1 – Mix the Base:
In a large bowl, beat peanut butter and butter until creamy. Gradually add icing sugar, mixing until smooth and thick. Stir in the crushed Butterfinger pieces.
Step 2 – Shape the Balls:
Scoop small portions of the mixture and roll into bite-sized balls. Place them on a parchment-lined baking sheet and chill for 30 minutes to firm up.
Step 3 – Melt the Chocolate:
In a microwave-safe bowl, combine chocolate chips and vegetable oil. Heat in 30-second intervals, stirring between each, until smooth and glossy.
Step 4 – Coat and Set:
Dip each chilled ball into the melted chocolate, coating evenly. Allow excess chocolate to drip off, then return to the baking sheet. Let set at room temperature or refrigerate to harden quickly.
Why You’ll Love This Recipe
- Easy and no-bake: Ready in under an hour with minimal cleanup.
- Rich & creamy: Perfect balance of peanut butter and chocolate.
- Crowd-pleaser: Ideal for holidays, parties, or gifting.
- Make-ahead friendly: Keeps beautifully in the fridge or freezer.
Tips
- Use a cookie scoop for even sizes.
- Chill the balls before dipping — it helps the chocolate stick better.
- Add a drizzle of white chocolate for a festive touch.
Variations
- Swap Butterfinger for Reese’s Pieces or crushed pretzels.
- Use dark chocolate chips for a richer flavor.
- Add a pinch of sea salt on top for a gourmet twist.
FAQs
- Can I make these ahead? Yes! They store perfectly for up to a week in the fridge.
- Can I freeze them? Absolutely — freeze for up to 3 months.
- Do they need to be refrigerated? Yes, to keep the chocolate coating firm.
- Can I use natural peanut butter? Only if well-stirred; otherwise, texture may change.
- Can I use almond butter instead? Definitely — just expect a softer flavor.
- What if I don’t have Butterfinger bars? Try any crispy peanut candy.
- Can I coat them with white chocolate? Yes, for a creamy variation.
- Can I skip the oil? You can, but oil helps the chocolate melt smoothly.
- How to make them vegan? Use vegan butter, plant-based chocolate, and dairy-free peanut butter.
- How many does this make? About 24–30 bite-sized balls.
Health Benefits
Peanut butter offers healthy fats, protein, and fiber, while dark chocolate provides antioxidants. When enjoyed in moderation, these treats are a deliciously satisfying energy boost.
How to Serve
Serve them chilled on a dessert platter, pack them in gift boxes, or enjoy with a cup of coffee for a sweet afternoon pick-me-up.
Make Ahead & Storage
- Make Ahead: Prepare and store uncoated balls in the fridge up to 2 days ahead.
- Storage: Keep in an airtight container in the fridge for up to 7 days.
- Freezer-Friendly: Store in a freezer-safe bag for up to 3 months. Thaw in the fridge before serving.
Conclusion
These Butterfinger Peanut Butter Balls are the perfect mix of nostalgia and indulgence — a crunchy, creamy, chocolate-dipped treat that’s as simple as it is satisfying. Make them once, and they’ll become a beloved no-bake favorite in your dessert rotation.


