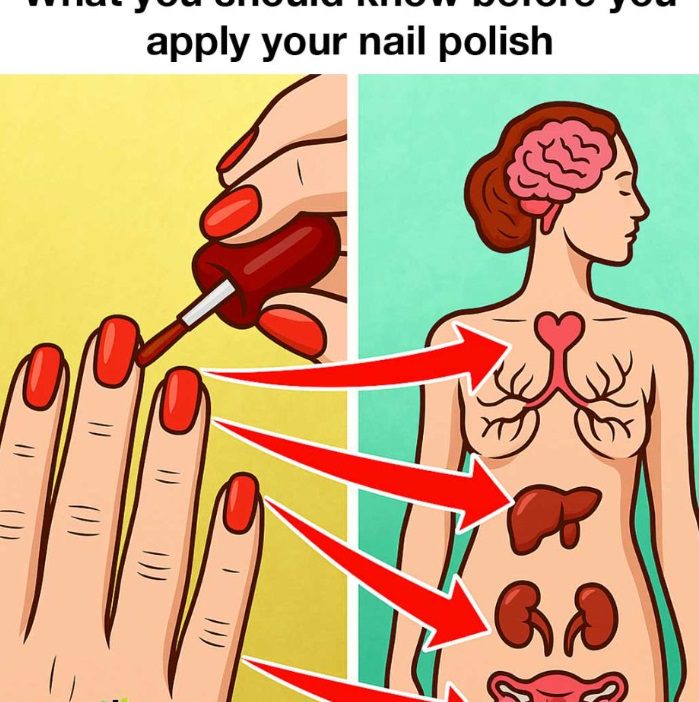
Nail salons don’t tell you this. What you should know before you apply your nail polish
How to Apply Nail Polish for a Smooth, Long-Lasting Manicure
Nail polish is an easy way to add color and personality to your look. With a little preparation and the right technique, you can achieve a smooth, glossy manicure at home without needing professional tools.
The secret is to prepare your nails properly, apply thin coats, and give the polish enough time to dry. It is also helpful to understand the ingredients in your nail products and how to use them safely.
In this guide, you will learn how to choose nail polish, prepare your nails, apply color evenly, make your manicure last longer, and remove polish without unnecessary damage.
Understanding Nail Polish Ingredients
Nail polish contains a combination of ingredients that help it spread smoothly, form a durable coating, and maintain its color. The exact formula varies by brand and product type, so checking the ingredient label is more useful than relying on marketing claims alone.
1. Film-Forming Ingredients
Film-forming ingredients create the solid coating left on the nail after the polish dries. Nitrocellulose is a common example.
These ingredients help give nail polish its familiar smooth finish. Liquid nail polish can also be flammable, so keep it away from flames, sparks, and other sources of heat.
2. Resins and Plasticizers
Resins help the polish adhere to the nail and create a durable finish. Plasticizers improve flexibility and can help reduce cracking.
Some formulas contain ingredients such as tosylamide/formaldehyde resin or other plasticizers. Certain ingredients may cause irritation or allergic reactions in susceptible people, so read the label if you have experienced a reaction to nail products before.
3. Solvents
Solvents, including ethyl acetate and butyl acetate, keep nail polish liquid enough to apply. They evaporate as the polish dries.
Their vapors can irritate the eyes, nose, or throat, particularly in a poorly ventilated room. Open a window or use the product in a well-ventilated area, and follow the manufacturer’s instructions.
4. Colorants and Pigments
Colorants create the shades and effects available in nail polish, from soft neutrals to bright colors and metallic finishes.
Different products use different pigments and decorative materials. If environmental impact is important to you, check whether a glitter polish explains what its decorative particles are made from rather than assuming all glitter is biodegradable.
5. Other Ingredients
Some formulas include stabilizers and other ingredients that help maintain the product’s appearance or performance. Their purpose and safety depend on the specific substance, concentration, and intended use.
Avoid assuming that an ingredient is harmful simply because its name sounds chemical. If you have a known sensitivity, check the full ingredient list and ask a qualified healthcare professional for advice when needed.
Nail Polish Ingredients to Know About
Certain ingredients have attracted attention because of potential health concerns or because they may cause irritation or allergies.
- Formaldehyde: Found in some nail hardeners and other nail products. It may irritate the skin and can trigger allergic reactions. Frequent use of formaldehyde-containing nail hardeners may also contribute to brittle nails.
- Toluene: A solvent used in some nail products. Exposure to its vapors can cause symptoms such as headache or dizziness, particularly with inadequate ventilation.
- Dibutyl phthalate (DBP): A plasticizer historically used in some nail polishes. Its use in cosmetics has been restricted in several markets.
- Tosylamide/formaldehyde resin: Used in some formulas to improve durability and adhesion. It can cause allergic reactions in some people.
- Triphenyl phosphate (TPHP): A plasticizer whose safety in nail products has been the subject of scientific review. Do not assume that every formula containing it has the same risk; check current guidance and the product’s intended market.
The presence of an ingredient does not automatically mean a product will cause harm when used as directed. Risk depends on factors such as the ingredient, concentration, exposure, ventilation, and individual sensitivity.
What Do “5-Free,” “7-Free,” and “10-Free” Nail Polishes Mean?
You may see nail polishes marketed as “5-free,” “7-free,” “10-free,” or with similar labels. These terms generally indicate that the manufacturer has excluded a stated number of selected ingredients from its formula.
However, the exact list can vary between brands. A higher number does not automatically prove that a product is safer, allergy-free, or better for everyone.
When choosing a polish:
- Read the ingredient list instead of relying only on the front label.
- Check whether the manufacturer explains what its “free-from” claim means.
- Choose products from reputable sellers with clear labeling.
- If you have a known allergy, check for the specific ingredient that triggers your reaction.
- Use the polish according to its directions and provide adequate ventilation.
No nail polish can be guaranteed to be suitable for every person.
How to Prepare Your Nails Before Applying Polish
Good preparation helps create an even finish and can reduce premature chipping.
- Remove old polish. Use a remover suitable for your nail polish. Acetone-free removers are an option, but they may take longer to remove some formulas.
- Shape your nails. Trim if needed and gently file the edges in your preferred shape.
- Clean your nails. Remove visible dust, dirt, and leftover polish. Make sure the nail surface is dry before applying color.
- Care for your cuticles gently. Avoid cutting them or pushing them back forcefully, as this can damage the surrounding skin and increase the risk of infection.
- Apply a base coat. A suitable base coat can help polish adhere evenly and reduce staining from some darker shades.
Avoid soaking your nails immediately before polishing. Excess moisture can temporarily affect the nail plate and may interfere with how well the polish adheres.
How to Choose the Right Nail Polish
The best polish depends on your preferred look, the occasion, and how much maintenance you want.
Color: Neutral shades such as beige, soft pink, and taupe are versatile choices for everyday wear. Red, deep burgundy, and brighter colors can create a more noticeable look.
Finish: Glossy polish gives a classic shine, matte polish creates a softer appearance, and glitter or metallic formulas add texture and sparkle.
Formula: Some polishes are designed for quick application, while others focus on durability or particular finishes. Read the product directions and reviews, keeping in mind that wear time varies from person to person.
Personal sensitivity: If a product has caused itching, redness, swelling, or a rash before, do not continue using it. Check the ingredients and seek medical advice if symptoms persist or worsen.
Step-by-Step: How to Apply Nail Polish
Follow these steps for a neat manicure at home.
Step 1: Apply a Thin Base Coat
Brush on a thin, even layer of base coat. Avoid flooding the cuticles or getting product on the surrounding skin. Let it dry according to the label.
Step 2: Apply the First Coat of Color
Wipe excess polish from the brush against the bottle’s neck. Place a small amount near the center of the nail, slightly away from the cuticle, and guide the brush toward the tip.
Use a few controlled strokes to cover the center and sides. Thin coats are generally easier to control and dry more evenly than thick ones.
Step 3: Let the First Coat Set
Give the first coat enough time to set before applying another. The waiting time depends on the formula, the thickness of the layer, and the room conditions.
Step 4: Apply the Second Coat
Apply a second thin coat to improve coverage and even out the color. Some sheer shades may need additional layers, while highly pigmented formulas may require fewer.
Step 5: Finish With a Top Coat
Once the color layers have set sufficiently, apply a compatible top coat. It can add shine and help protect the manicure from everyday wear.
For extra edge protection, lightly brush the top coat across the free edge of the nail, provided the product directions allow it.
Tips for Faster Drying and Fewer Smudges
A manicure may feel dry on the surface before the deeper layers have fully hardened. These simple habits can help:
- Apply thin coats rather than one thick coat.
- Use a quick-dry top coat designed for nail polish.
- Follow the waiting times printed on the product label.
- Avoid touching fabrics, buttons, or other surfaces while the polish is setting.
- Keep freshly polished nails away from excessive heat and open flames.
- Do not rely on cold water as a guaranteed way to dry polish; it may not harden the layers underneath.
Even when a manicure feels dry to the touch, handle your nails carefully until the polish has had enough time to set.
How to Make Your Nail Polish Last Longer
A few everyday habits can help maintain your manicure:
- Apply a fresh top coat when needed, following the product’s directions.
- Wear household gloves when washing dishes or cleaning with detergents.
- Avoid using your nails as tools to open cans, scrape labels, or pry objects apart.
- Moisturize your hands and cuticles regularly, especially after washing your hands or removing polish.
- Give your nails a break if they become dry, brittle, sore, or discolored.
- Avoid picking or peeling off polish, which can remove layers of the nail surface.
If your nails remain painful, unusually discolored, or damaged, stop applying polish over the affected area and consider getting advice from a healthcare professional.
How to Remove Nail Polish Safely
When you are ready to change your color, use a remover that works with your polish and follow its instructions.
- Work in a well-ventilated area.
- Moisten a cotton pad with the appropriate remover.
- Press it gently against the nail for a few seconds to help loosen the polish.
- Wipe away the softened color without aggressive scrubbing.
- Repeat gently if necessary rather than scraping the nail.
- Wash your hands and apply hand cream or cuticle moisturizer afterward.
Acetone-free removers may be less drying for some people, but they are not always as effective on every type of polish. Acetone can remove conventional polish efficiently, although it may leave nails and surrounding skin feeling dry. Choose according to the product and your needs.
Never use a remover near a flame, and keep nail products out of the reach of children.
Five Nail Polish Safety Tips
1. Provide ventilation. Use nail polish and remover in a well-ventilated area to reduce exposure to vapors.
2. Avoid skin and eye contact. Follow the label, and do not use a product in a way that is not intended by the manufacturer.
3. Watch for allergic reactions. Redness, itching, swelling, or a rash can be signs of irritation or allergy. Stop using a product that appears to cause a reaction.
4. Protect your natural nails. Avoid picking off polish, cutting cuticles, or filing the nail surface aggressively.
5. Store and dispose of products responsibly. Keep bottles tightly closed and away from heat or flames. Follow local guidance for disposing of leftover polish and remover rather than pouring them down a drain.
Frequently Asked Questions
How many coats of nail polish should I apply?
For many standard nail polishes, one base coat, two thin coats of color, and one top coat work well. The exact number depends on the formula and how much coverage you want.
Why does my nail polish chip so quickly?
Chipping can happen when polish is applied too thickly, the nail surface is damp or oily, the layers have not set sufficiently, or the nails experience frequent water exposure and friction. Careful preparation and thin layers may help.
Is “10-free” nail polish completely safe?
No label can guarantee that a product will be suitable for everyone. “10-free” generally describes ingredients that the manufacturer says it has excluded. Read the ingredient list, check the definition used by the brand, and consider any personal sensitivities.
Is acetone-free nail polish remover better?
Not necessarily for every person or every formula. Acetone-free removers may be useful for routine removal but can take longer to dissolve some polishes. Acetone is effective but may dry out nails and skin. Gentle technique and moisturizing afterward are helpful with either option.
Should I cut my cuticles before applying nail polish?
It is best to avoid cutting or forcefully pushing back the cuticles. They help protect the area around the nail, and damaging them can increase the risk of irritation or infection.
When should I stop using a nail product?
Stop using it if you develop itching, redness, swelling, pain, or a rash. If symptoms persist, worsen, or involve significant swelling or other concerning symptoms, seek medical advice.
Final Thoughts
A beautiful manicure starts with clean, dry nails, thin coats, and a little patience. Choosing a suitable formula, following the product instructions, and allowing enough drying time can help your polish look smoother and last longer.
It is also worth paying attention to ingredient labels and using nail products with good ventilation. Marketing terms such as “5-free” or “10-free” can offer useful information, but they should not replace careful label reading or awareness of your own sensitivities.
With a few simple habits, you can enjoy colorful, well-kept nails while taking sensible steps to protect your natural nails and the skin around them.
This article is for general informational purposes only and is not a substitute for professional medical advice, diagnosis, or treatment.