Creamy Caramel Custard Pie
Introduction
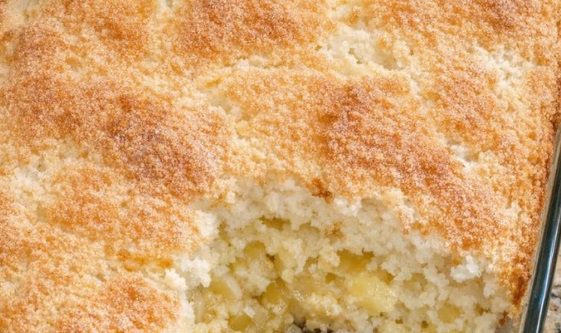
There’s something undeniably irresistible about a creamy caramel custard pie. Its silky, rich filling perfectly balanced with a buttery, flaky crust makes it an indulgent treat for any occasion. Whether it’s a special holiday dessert or a simple weekend delight, every bite delivers a luscious combination of sweetness and creaminess that leaves everyone asking for seconds.
Making this pie from scratch is a rewarding experience. Watching the caramel slowly transform into a golden hue and then blending it into a smooth custard feels like a small kitchen miracle. The aroma alone fills your home with warmth and anticipation.
This recipe is approachable yet elegant, ideal for bakers of all skill levels. With easy-to-follow steps and tips for success, you can create a dessert that rivals bakery quality while keeping it entirely homemade and wholesome.
Ingredients
For the Crust:
- 1 ½ cups all-purpose flour
- ½ cup unsalted butter, chilled and diced
- ¼ cup granulated sugar
- ¼ tsp salt
- 2–4 tbsp ice water
For the Caramel Custard Filling:
- 1 cup granulated sugar (for caramel)
- 2 cups whole milk
- 1 cup heavy cream
- 4 large eggs
- ½ cup brown sugar
- 1 tsp vanilla extract
- ¼ tsp salt
Step-by-Step Instructions
1. Prepare the Crust
Mix flour, sugar, and salt in a bowl. Cut in chilled butter until mixture forms coarse crumbs.
Gradually add ice water, one tablespoon at a time, until dough forms. Chill for 30 minutes.
Roll out the dough and fit it into a pie pan. Pre-bake at 375°F (190°C) for 10–12 minutes.
2. Make the Caramel Custard Filling
Melt granulated sugar in a saucepan over medium heat until amber-colored. Carefully whisk in milk and cream until smooth. Remove from heat.
In a separate bowl, whisk together eggs, brown sugar, vanilla, and salt. Slowly add the caramel mixture, whisking constantly to prevent curdling.
3. Bake the Pie
Pour filling into pre-baked crust. Bake at 325°F (160°C) for 45–55 minutes, until the center is set but slightly jiggly.
Cool completely before serving.
Serving Tips
- Serve chilled or at room temperature with a dollop of whipped cream for extra indulgence.
- Pair with coffee or tea for an elegant dessert experience.
Storage Tips
- Store in the refrigerator for up to 4 days.
- Avoid freezing, as custard pies don’t retain texture well after thawing.
Tips for Success
- Avoid overbaking; the custard should have a gentle wobble in the center.
- Use a water bath to prevent cracking if desired.
- Allow the pie to cool completely before slicing to maintain its structure.
Variations & Substitutions
- Crust: Use graham cracker or cookie crust for added sweetness.
- Flavor Add-ins: Cinnamon, nutmeg, or a hint of espresso enhance the depth of flavor.
- Dairy-Free: Substitute plant-based milk and cream for a vegan-friendly version.
Health Benefits
Provides calcium and vitamin D from dairy.
Contains protein from eggs.
Can be lightened with reduced-fat milk or sugar alternatives while retaining flavor.
Nutritional Information (per serving)
Calories: 320
Total Fat: 18g
Carbohydrates: 35g
Protein: 6g
Fiber: 1g
Sugar: 25g
Frequently Asked Questions (FAQs)
- Can I make this pie ahead of time?
Yes, prepare it up to 2 days in advance and refrigerate. - How do I prevent the custard from cracking?
Bake in a water bath and monitor baking time closely. - Can I freeze the pie?
Custard pies do not freeze well; refrigeration is best. - Can I add toppings?
Caramel drizzle, toasted nuts, or whipped cream are excellent options. - Is there a lower-sugar version?
Substitute granulated sugar with sugar alternatives and reduce brown sugar slightly.
Conclusion
This creamy caramel custard pie is a timeless dessert that delights every palate. Its luscious custard and flaky crust create the perfect combination of texture and flavor, ideal for celebrations or everyday indulgence. Follow this recipe for a foolproof, irresistible pie that will become a staple in your dessert repertoire.